How to Maintain Your Bike at Home: Essential DIY Repair and Care Tips

James Whitfield
29 May 2026
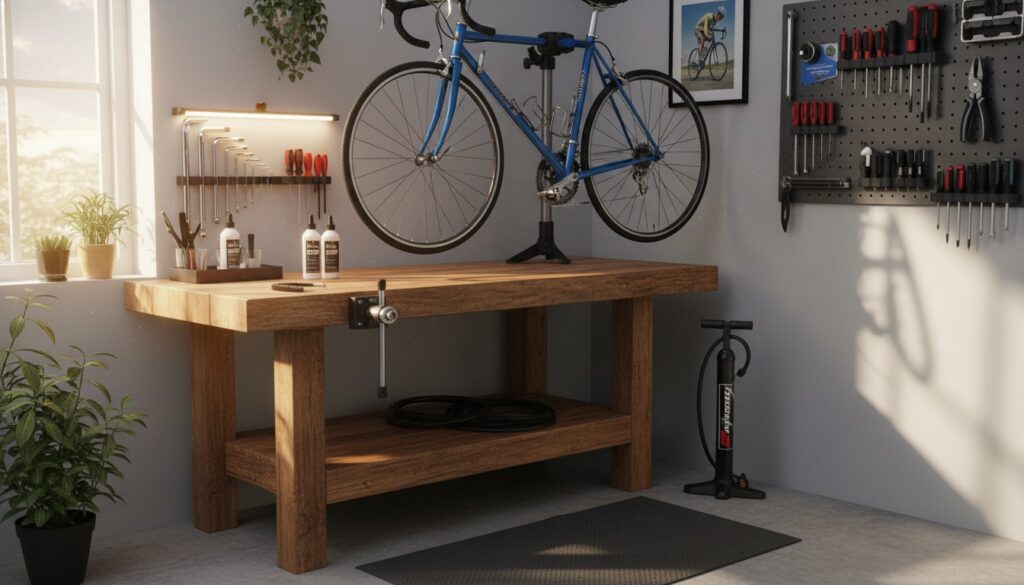
How to Maintain Your Bike at Home: Essential DIY Repair and Care Tips
Whether you’re a daily commuter, a weekend trail warrior, or someone who simply enjoys a leisurely ride through the neighborhood, your bicycle is an investment worth protecting. The good news? You don’t need to visit a bike shop every time something squeaks, rattles, or feels a little off. With a handful of basic tools, some patience, and the right knowledge, you can keep your bike running like new — all from the comfort of your own garage or apartment.
In this comprehensive guide, we’ll walk you through everything from building your essential toolkit to mastering tire changes, brake adjustments, chain maintenance, and seasonal care routines. By the end, you’ll feel confident tackling the most common bicycle repairs and maintenance tasks on your own, saving both time and money in the process.
Building Your Home Bike Repair Toolkit
Before you can wrench on your bike, you need the right tools. The beauty of bicycle maintenance is that you don’t need an expensive, professional-grade workshop to get started. Here’s what every home mechanic should have on hand:
The Essentials
- Allen key set (hex wrenches) — Most bicycle bolts use hex heads, typically ranging from 2mm to 8mm. A good set of L-shaped Allen keys is non-negotiable.
- Tire levers — These small plastic or metal levers make removing tires from rims dramatically easier.
- A quality floor pump with a pressure gauge — Proper tire inflation is the single easiest way to improve your ride quality and prevent flats.
- Chain lubricant — Choose between wet lube (for rainy or muddy conditions) and dry lube (for dry, dusty environments).
- A set of Phillips and flathead screwdrivers — For derailleur adjustments and various small components.
- An adjustable wrench or a set of open-end wrenches — Useful for pedals, axle nuts, and headset adjustments.
- A chain breaker tool — Essential if you ever need to remove, shorten, or replace your chain.
- Degreaser and clean rags — For removing built-up grime from the drivetrain.
- A bike repair stand that holds your bike at a comfortable working height
- A torque wrench for carbon fiber components (over-tightening can crack carbon)
- Spoke wrench for truing wheels
- Cable cutters for clean brake and shift cable cuts
- A patch kit and spare inner tubes
- Road bikes: 80–130 PSI
- Hybrid bikes: 50–70 PSI
- Mountain bikes: 25–50 PSI
- Look for embedded debris — small pieces of glass, thorns, or wire that haven’t fully punctured the tube yet.
- Check for cracks, cuts, or bulges in the sidewall or tread.
- Examine the tread wear — if the center of your tire is visibly flatter or smoother than the edges, it’s time for a replacement.
- Patch the tube using a patch kit — roughen the area around the hole with sandpaper, apply vulcanizing glue, wait until tacky, and press the patch firmly in place.
- Replace the tube entirely with a new one of the correct size.
- Apply degreaser to the chain while slowly backpedaling. You can use a dedicated chain cleaning tool (a small device that clamps around the chain and scrubs it with brushes) or simply apply degreaser to a rag and run the chain through it.
- Scrub the cassette and chainrings with a stiff brush and degreaser to remove built-up grime.
- Rinse with water (avoid high-pressure hoses, which can force water into bearings).
- Dry thoroughly with a clean rag.
- Apply one drop of chain lube to each link while slowly backpedaling.
- Let the lube penetrate for 5–10 minutes.
- Wipe off the excess with a clean rag. Excess lube attracts dirt and creates a grinding paste that accelerates wear.
- Check brake pad alignment: The pads should contact the rim squarely, not rubbing on the tire or dipping below the rim. Most pads can be repositioned using an Allen key.
- Inspect pad wear: Rim brake pads have wear indicator grooves. When the grooves are no longer visible, replace the pads immediately.
- Adjust cable tension: If your brake levers pull too close to the handlebars before engaging, your cables may have stretched. Use the barrel adjuster (the small knob where the cable meets the brake lever) to take up slack. Turn it counterclockwise to tighten.
- Clean your rims: Wipe your braking surfaces with rubbing alcohol to remove oil and grime that reduce braking performance.
- Check rotor alignment: Spin the wheel and look for the rotor wobbling between the brake pads. A slightly bent rotor can be carefully straightened with a rotor truing tool or a clean adjustable wrench.
- Inspect pad thickness: Disc brake pads should have at least 1mm of pad material remaining. Thinner than that, and you risk metal-on-metal contact that damages the rotor.
- Avoid contamination: Never touch your disc brake rotors or pads with bare hands. Oils from your skin can contaminate the braking surface and cause squealing or reduced performance. Use rubbing alcohol to clean rotors.
- Bed in new pads: When you install new brake pads, perform 20–30 moderate stops from moderate speed to properly bed the pads to the rotor surface.
- A — Air: Squeeze your tires. Are they firm? Check the pressure with a gauge if you’re unsure.
- B — Brakes: Squeeze each brake lever. Do the brakes engage firmly before the lever reaches the handlebar? Do the pads contact the rim or rotor evenly?
- C — Chain: Look at your chain. Is it clean and lubricated, or dry and rusty? Does it shift smoothly through the gears?
- Quick releases and thru-axles: Are your wheels securely fastened? Give each wheel a tug to make sure.
- [ ] Clean and lubricate the chain
- [ ] Inspect tires for wear, cuts, and embedded debris
- [ ] Check brake pad wear and alignment
- [ ] Inspect cables and housing for fraying or corrosion
- [ ] Tighten all bolts (handlebars, stem, seat post, bottle cages)
- [ ] Check wheel trueness by spinning each wheel and watching for wobble
- [ ] Lubricate pivot points on derailleurs and brake calipers
- Wash the entire frame with warm soapy water and a soft brush. Avoid spraying water directly at bearings (headset, bottom bracket, hubs).
- Deep clean the drivetrain using degreaser, brushes, and plenty of rags.
- Inspect the frame for cracks, dents, or paint chips that could indicate structural damage.
- Check headset and bottom bracket bearings for play or roughness. Lift the front of the bike and turn the handlebars — they should rotate smoothly with no clicking or resistance.
- Inspect spokes for loose or broken ones. A loose spoke can lead to a wheel going out of true.
- Replace cables and housing if they show signs of fraying, rust, or stiffness. Fresh cables make a dramatic difference in shifting and braking performance.
- Wheel building or major wheel truing — Proper spoke tensioning requires skill and a truing stand.
- Bottom bracket and headset overhaul — These require press-fit tools and careful alignment.
- Suspension service — Fork and rear shock internals need specific oils, seals, and expertise.
- Frame alignment — If your bike has been in a crash, a professional can check for hidden damage.
- Hydraulic brake bleeding — While doable at home, it requires a bleed kit specific to your brake brand and careful technique.
Nice-to-Have Upgrades
Pro Tip: Store your tools in a dedicated toolbox or wall-mounted organizer. When everything has a place, maintenance becomes faster and more enjoyable.
Tire Maintenance: Inflation, Inspection, and Flat Repair
Tires are your bike’s only contact with the road, making them arguably the most important component to maintain. Neglecting your tires leads to poor handling, increased rolling resistance, and a much higher risk of flats.
Proper Tire Inflation
Every tire has a recommended pressure range printed on its sidewall, typically measured in PSI (pounds per square inch) or bar. As a general guideline:
Inspecting Your Tires
Once a week, give your tires a thorough visual inspection:
How to Fix a Flat Tire at Home
Flat tires are the most common bicycle issue, and fixing one is a fundamental skill every cyclist should master.
Step 1: Flip your bike upside down or mount it on a repair stand. Release the brake (if rim brakes) and remove the wheel using the quick-release lever or axle nuts.
Step 2: Use your tire levers to pry one side of the tire bead off the rim. Hook the first lever under the bead, then slide the second lever around the rim to unseat the tire.
Step 3: Pull out the inner tube and inflate it to locate the puncture. Listen for hissing air, or submerge the tube in water and look for bubbles.
Step 4: You have two options:
Step 5: Before reinstalling, run your fingers along the inside of the tire to check for the object that caused the flat. Skipping this step is the number one reason people get repeat flats.
Step 6: Partially inflate the new or patched tube, tuck it back into the tire, reseat the tire bead onto the rim (using your hands, not tire levers, to avoid pinching the tube), and inflate to the recommended pressure.
Important: Always carry a spare tube, tire levers, and a mini pump or CO2 inflator when you ride. Knowing how to fix a flat at home is great, but being able to do it on the road is even better.
Chain and Drivetrain Care
Your drivetrain — the chain, cassette, chainrings, and derailleurs — is the engine of your bicycle. A dirty, dry, or worn drivetrain wastes energy, shifts poorly, and wears out expensive components prematurely.
Cleaning Your Chain
A clean chain is a happy chain. Aim to clean your drivetrain every 100–200 miles, or more frequently if you ride in wet or muddy conditions.
Lubricating Your Chain
Once the chain is clean and dry, it’s time to lubricate:
Checking for Chain Wear
Chains stretch over time, and a worn chain will rapidly destroy your cassette and chainrings. Use a chain wear indicator tool (also called a chain checker) to measure elongation. Most chains should be replaced when they reach 0.5% to 0.75% stretch. Replacing a $20–$40 chain is far cheaper than replacing a $50–$150 cassette.
Brake Adjustment and Maintenance
Reliable brakes are non-negotiable for safe cycling. Whether your bike uses rim brakes or disc brakes, regular inspection and adjustment will keep your stopping power strong.
Rim Brake Maintenance
Disc Brake Maintenance
Safety Note: If you ever feel uncertain about your brake adjustment, don’t ride the bike until you’re confident the brakes are working correctly. Brakes are the one area where a mistake can have serious consequences.
Seasonal Maintenance and Pre-Ride Checks
Consistency is the key to keeping your bike in excellent condition. Establishing a routine takes the guesswork out of maintenance.
The ABC Quick Check (Before Every Ride)
This takes less than two minutes and can prevent most mechanical issues:
Monthly Maintenance Checklist
Seasonal Deep Clean (Every 3–6 Months)
Two to four times per year — especially at the start and end of riding season — give your bike a thorough deep clean:
When to Seek Professional Help
While DIY maintenance can handle the vast majority of bicycle care, there are some tasks that are best left to a professional mechanic — especially if you don’t have specialized tools or experience:
Conclusion
Maintaining your bike at home is one of the most rewarding skills you can develop as a cyclist. Not only does it save you significant money over time, but it also deepens your understanding of how your bike works, builds confidence on the road or trail, and ensures that your ride is always safe, smooth, and enjoyable.
Start with the basics: keep your tires inflated, your chain clean and lubricated, and your brakes properly adjusted. As your confidence grows, you’ll naturally expand your skills to tackle more advanced repairs. The key is consistency — a few minutes of attention before each ride and a monthly maintenance session will prevent the vast majority of mechanical problems before they start.
Your bike takes care of you on every ride. Return the favor by taking care of it.
Ready to Get Started?
Grab your Allen keys, pump up those tires, and give your chain a good cleaning this weekend. Bookmark this guide so you can reference it anytime you need a refresher. If you found this article helpful, share it with a fellow cyclist who could use some DIY maintenance tips. And if you have a favorite bike maintenance hack we didn’t cover, drop it in the comments below — we’d love to hear from you!
Happy wrenching and happy riding!
— Robert Taylor